As the weather warms, that exciting feel of hitting the road in your RV builds. You plan out your trip, gather supplies, and pack your gear. Then, it’s time to get your RV out of storage and ready for the road. However, RVs require unique maintenance, especially if you store them for the winter. You want to ensure your home away from home remains comfortable, efficient, and safe. Assuming you winterize your RV in the fall, you must de-winterize it in the spring. To help, we had our maintenance experts put together a guide to prepare your RV for use.
Visually Inspect the Exterior
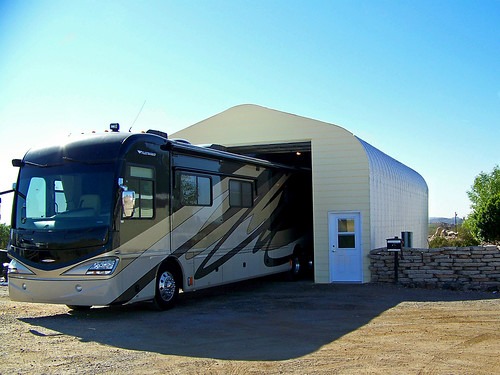
Many things can happen to your RV during winter. If you store your RV outdoors, even covered, New York weather can affect your RV’s condition. Walk around your RV and check for any damage or cracks to surfaces, window seals, and slide-out seams. If you experience snow accumulation over the winter, check your roof for structural damage that could lead to leaks. Replace or repair any seals that show signs of cracking or leaking.
If you have a tow-behind camper, we recommend you inspect your hitch for rust or damage to prevent unwanted wear and tear. Check your RV’s tires for cracks or damage. At a minimum, you’ll need to add air, as tires naturally lose pressure over time. It’s also a good idea to inspect the frame and axles to ensure no rust or structural damage is present.
Flush and Sanitize Your Water System
Winterizing your RV probably included adding a nontoxic antifreeze to the water system. Now you must flush the antifreeze and replace it with potable water for drinking, showering, and cleaning. If you put your water heater in bypass mode for the winter, you can begin flushing by turning on your water pump. Next, open all your faucets, including indoor and outdoor sinks and showers, and allow the water to run for several minutes. Finally, flush the toilet three to four times while the water runs.
After a few minutes, the water should come out clear, and you can turn the water off. Remember to shut off all your faucets. Finally, you can remove your water heater from bypass mode and replace all your water filters. You should always dump your gray and black water holding tanks at an authorized location.
If you didn’t put your water heater into bypass mode, you need to drain and replace the antifreeze from there before replacing any filters.
Tip: Add baking soda to remove any residual antifreeze taste.
After flushing the system, we recommend sanitizing to remove mold or bacteria that can grow during storage. First, mix one cup of bleach for every 15 gallons of water your tank holds and add the mixture to your fresh water tank until full. Then, turn on your water pump and open all faucets, letting the water run. Once you smell the bleach, turn the water off and let the mixture sit for several hours.
Because of the corrosive nature of bleach, you don’t want the solution to sit for more than 12 hours or you could damage seals and gaskets. Next, flush the system with potable water until you no longer smell bleach.
Tip: Check your plumbing system for leaks while you flush the system by turning on the water pump with all faucets closed to pressurize the system. You have a leak somewhere if the water pump turns on after a few minutes.
Check LP Tanks and Appliances
After reinstalling your propane tanks, open the tank valves and check for leaks by spraying or sponging soapy water on the lines. If you see any bubbling, you have a leak. Shut off the tank valve and replace the line. Once you confirm a leak-free system, turn on your propane appliances and test them to ensure they work correctly. If any gas-fired device doesn’t work, have a professional inspect it immediately.
Tip: Make sure you fill your LP water heater with water before turning it on to avoid damage to the heating element.
Test Your RV Generator
We recommend you check your onboard generator’s oil level before starting it. Then, inspect the generator’s exhaust system for rust or damage. A leaky exhaust system can damage the generator and cause dangerous levels of carbon monoxide to enter your RV. Next, test your generator for several hours on a half-rated load.
Tip: Exercise your generator monthly during the winter to keep it running at peak performance and easy to use.
Change Your RV’s Air and Water Filters
Air filters collect dust and debris, and bacteria and mold proliferate on water filters. So start your RV season with new filters for a clean and healthy experience. As a result, you will enjoy cleaner air and water, and your RV systems will operate more efficiently.
Inspect Your RV’s Windows and Air Vents
Opening your RV’s windows for a few hours will help refresh the inside air. However, opening and inspecting your vents ensures proper airflow, which prevents excess humidity in the cooling system. Properly functioning vents also prevent dangerous gas buildup inside your RV when you turn on the heat on cooler nights.
Inspect Your RV’s Safety Systems
Your RV likely has a smoke alarm, fire extinguisher, carbon monoxide detector, and LP detector. We recommend you always test these systems before your first RV adventure. Note each system’s alarm and refresh yourself on the dangers and symptoms these systems detect. You also want to make sure your fire extinguisher hasn’t expired.
Tip: Start your season by replacing the batteries in all your safety systems.
Refresh Your First Aid and Emergency Kits
Hopefully, you haven’t had to use your first aid or emergency equipment much. However, some first aid and emergency items expire over time. We recommend you inspect all these items and replace them if necessary. And, of course, replenish your bandages, so if and when you need them, you can rely on them to work as designed. Your safety depends on it.
We hope you found this guide helpful. However, we know some RV enthusiasts prefer to have a professional inspect and de-winterize their RV. So if that’s something you prefer, you can schedule your de-winterization service online at one of our six convenient locations, and we’ll take care of the rest.
